Introduction:
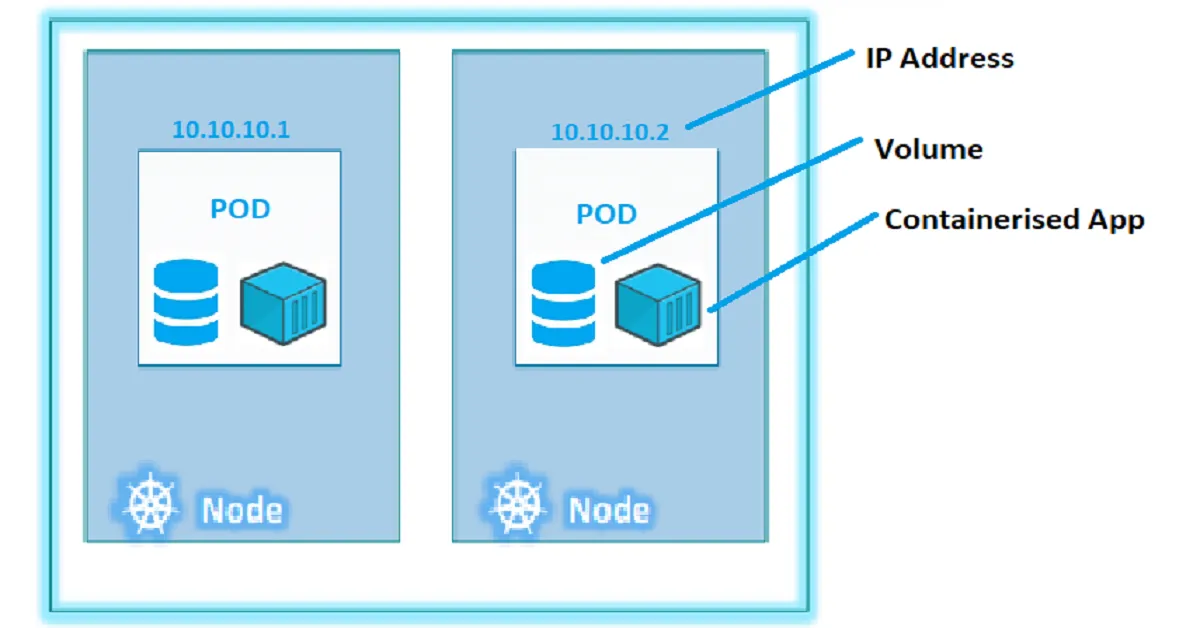
In the world of containerization and orchestration, Kubernetes has emerged as a powerful tool for managing and scaling applications. Kubernetes pod is a group of one or more containers that share storage and network resources, and are designed to run together. In this article, we’ll explore the concept of Kubernetes pods and understand why they play a crucial role in container orchestration.
What is a Kubernetes Pod?
In Kubernetes, a pod is the smallest and most basic unit of deployment. It represents a logical group of one or more containers that are tightly coupled and share the same context, storage, and network resources. Pods are designed to be ephemeral and disposable, meaning they can be easily created, destroyed, or replicated as per the application’s requirements.
Why Pods?
Pods were introduced to facilitate the execution of containerized applications in various runtime environments, such as Docker, Rocket, and more. They provide a unified way to manage containers and simplify the deployment process. Furthermore, pods are scalable, manageable, and isolated units that can be scheduled and replicated within a Kubernetes cluster.
Understanding Pod Isolation:
Within a pod, containers share a common context known as a shared context. This shared context comprises Linux namespaces, cgroups, and other isolation mechanisms, similar to those used in Docker containers. Each application within the pod can also have additional sub-isolations applied as needed.
Key Points about Kubernetes Pods:
- Grouping: A pod can contain multiple containers, allowing tightly coupled applications to have multiple containers within a single pod.
- Smallest Unit: Pods are the smallest deployable unit in Kubernetes, representing a single instance of an application.
- IP Address: Each pod is assigned a unique IP address within the cluster, facilitating communication and networking.
- Resource Sharing: Containers within the same pod share storage volumes and network resources and can communicate using the localhost interface.
- Replication: Pods serve as the unit of replication in Kubernetes. When an application’s demand increases, additional replicas of the pod can be deployed to handle the load.
- YAML Configuration: Kubernetes uses YAML to describe the desired state of the containers within a pod, often referred to as a Pod Spec. These specifications are provided to the kubelet through the API server.
- Resource Management: While it’s possible to have multiple containers within a pod, it’s generally recommended to limit the number of containers to avoid resource wastage.
Working with Kubernetes Pods:
Now, let’s explore some basic commands that will help you interact with Kubernetes pods.
- Creating a Pod:
a. Creating pod using declarative approach
We have pod.yaml manifest which we can use to create pod named as mypodapiVersion: v1
kind: Pod
metadata:
name: mypod
spec:
containers:
- name: mycontainer
image: nginxNow, let’s create pod by applying the manifest file using below command
kubectl create -f pod.yaml
b. Creating pod using imperative approach
To create a pod, you can use kubectl run command.
For example: Below command will create a new pod named “firstpod” in your Kubernetes cluster, using the “nginx” container image
kubectl run firstpod --image=nginx-
Listing Pods: To retrieve a list of pods, you can use the kubectl get command.
kubectl get pods
You can also use additional options to customize the output, such as given below for a wider view, YAML and JSON formats, respectively.
kubectl get pods -o widekubectl get pods -o yamlkubectl get pods -o json -
Exploring Pod Details: To gather detailed information about a specific pod, you can use below command. This will provide insights into the pod’s contents and track any ongoing events within the pod.
kubectl describe pod <PodName>You can also use the
-wparameter to continuously watch the output. You can also filter the list using a label selector and the –selector flag. -
To delete a pod in Kubernetes, you can use the kubectl delete command. Here’s the general syntax:
kubectl delete pod <PodName>
-
Kubectl Explain: To get information about the component of Kubernetes we can use explain command.
For instance, if we desire to acquire further information about pods, we can utilize the following instruction. Executing this command will launch the pod’s manual, which can prove valuable in identifying the Kubernetes component version during YAML file compositionkubectl explain pods
Conclusion:
Kubernetes pods serve as the foundation for running containerized applications in a Kubernetes cluster. By grouping containers together and providing shared resources, pods streamline the deployment and management of applications. Understanding the basics of pods and familiarizing yourself with the relevant commands will empower you to harness the full potential of Kubernetes for container orchestration.


Pingback: Environment Variables In Kubernetes Pods - Bitsify