Introduction
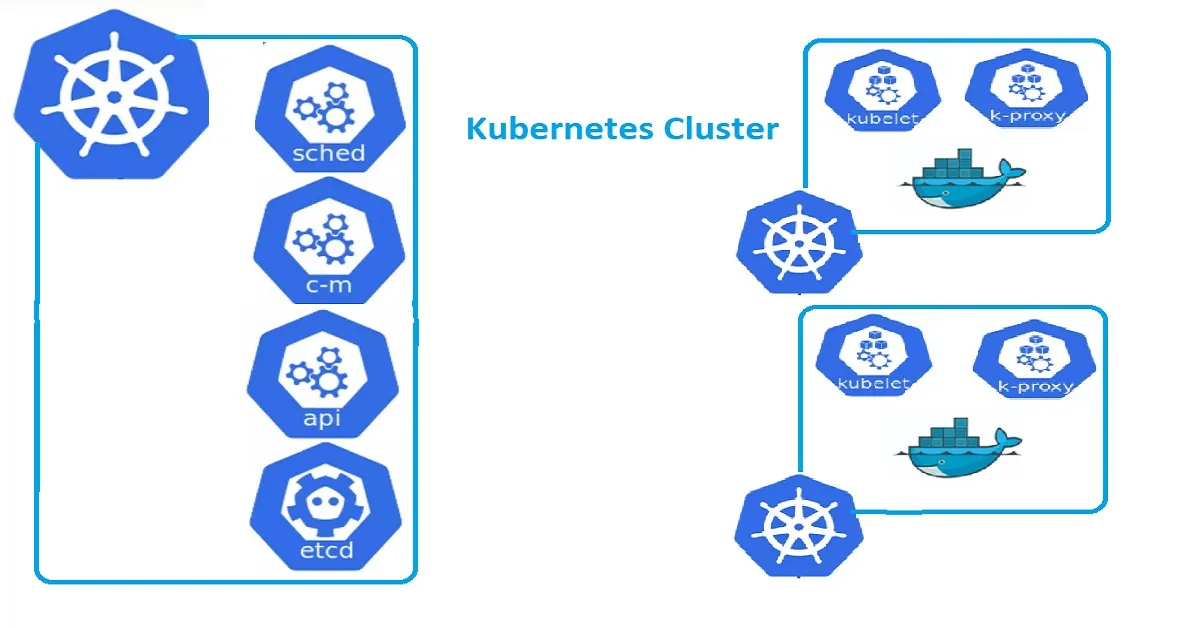
Kubernetes has become the de facto standard for container orchestration, enabling organizations to efficiently manage and scale containerized applications. In this article, we will guide you through the step-by-step process of setting up a complete Kubernetes cluster on Ubuntu. Whether you’re a beginner or an experienced system administrator, this comprehensive guide will provide you with the knowledge and tools necessary to deploy and manage your own Kubernetes cluster.
Prior to getting started, we highly recommend going through our comprehensive previous guide, which provides detailed information about Kubernetes and its various components. This will equip you with a solid understanding of Kubernetes before you begin. Click here
Prerequisites For Lab Setup
Here is the model setup we will be using for this tutorial:
- Master Node: master-node with the IP address 10.64.0.21
- Worker Node 1: worker-node1 with the IP address 10.64.0.22
- Worker Node 2: worder-node2 with the IP address 10.64.0.23
Make sure that each node meets the following minimum requirements:
- 2 CPUs
- 8 GB of hard disk space
- 4 GB of RAM
Now that we have covered the basic requirements and the setup, let’s proceed to configure a Kubernetes cluster on Ubuntu 20.04.
Before diving into the Kubernetes installation, we need to prepare our Ubuntu environment for the setup.
Step 1: Configure Hostname and Update Host Files:
To begin, follow these steps to set up the hostname and update the host files for each Kubernetes node:
For the master node:
- Log in to the master-node using SSH.
- Set the hostname for the master node by executing the following command:
For the worker node 1:
- Log in to the worker node 1 using SSH.
- Set the hostname for the worker node 1 by executing the following command:
For the worker node 2:
- Log in to the worker node 2 using SSH.
- Set the hostname for the worker node 2 by executing the following command:
Next, update the /etc/hosts file on each of the three nodes with the respective IP addresses and hostnames. Open the file using a text editor and add the following entries:
10.64.0.22 worker-node1
10.64.0.23 worker-node2
Save the changes to the /etc/hosts file.
Now you are ready to proceed with the setup. Let’s move on to the next step.
Step2. Disable Swap Memory On Each Nodes:
Step 3. Install Docker On Master and Worker Nodes
Docker is a prerequisite for running Kubernetes as it provides the container runtime environment. Follow the steps below to install Docker on Ubuntu.
Installing Docker on All Nodes
- Update the package manager:
- Install Docker’s dependencies:
- Add the Docker GPG key:
- Add the Docker repository:
- Update the package manager again:
- Install Docker:
Configuring Docker
After installing Docker, there are a few configurations we need to apply.
- Create a new
dockergroup and add your user to it:
$ sudo usermod -aG docker $USER
- Enable Docker to start on boot:
- Restart Docker:
Step 4. Installing Kubernete
With Docker installed and configured, we can proceed to install Kubernetes components on our Nodes.
Adding Kubernetes repository
- Import the Kubernetes GPG key:
- Add the Kubernetes repository:
- Update the package manager:
Step 5. Setting up the Master Node
Now that we have Kubernetes installed, we can proceed to set up the master node of our cluster.
Initializing the cluster
- Initialize the cluster on the master node:
2. Follow the instructions provided by the kubeadm init command to set up the kubeconfig and join worker nodes
Configuring the networking
By default, Kubernetes doesn’t provide networking capabilities. We need to install a network plugin to enable communication between pods across different nodes.
- Install the Calico network plugin:
- Verify that the Calico pods are running:
Joining worker nodes to the cluster
To add worker nodes to the cluster, you need to run a kubeadm join command followed by a token and discovery hash provided during the kubeadm init step.
Step 6: Verify Cluster On the master node, you can check the status of the cluster by running:
Conclusion
Conclusion: Congratulations! You have successfully set up a complete Kubernetes cluster on Ubuntu. You can now leverage the power of Kubernetes to deploy and manage containerized applications at scale. This guide provided a comprehensive overview of the step-by-step process, from installing Docker and Kubernetes tools to configuring the master node and joining worker nodes. You’re now ready to embark on your containerization journey with Kubernetes!


